When you purchase through links on our site, we may earn an affiliate commission. This doesn’t affect our editorial independence.
Suppose you’ve been blocked from upgrading to Windows 11 because of an “unsupported” CPU; there’s a workaround (but Microsoft-approved) way to bypass the restrictions without altering your PC configuration or losing any files.
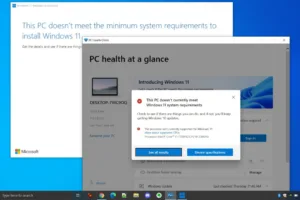
Even if your PC displays messages such as “This PC does not meet Windows 11 system requirements” or “The processor is not supported,” this simple solution can help you get over the problem. This solution has been tested and verified to work on numerous older PCs that did not support Windows 11.

Credit: PC Mag
Here is the whole three-step process:
Step 1: Download the Windows 11 ISO
The first step is to download the Windows installation assistant, also known as the Windows 11 ISO.
Here is how to Download the Windows 11 ISO:
- Go to [Microsoft’s official Windows 11 download page (https://www.microsoft.com/software-download/windows11).
- Scroll down to “Download Windows 11 Disk Image (ISO)”.
- In the dropdown, select Windows 11, click Download, pick your language, and confirm.
- Click 64-bit Download. The file is 5.1GB, so downloading may take some time.
Once the download is running, move on to the next step.
Step 2: Bypass the CPU Restriction With a Registry Hack
This is the most critical aspect of this tutorial. Hence, it is essential to pay the utmost attention. You will tweak a single registry key to trick Windows into ignoring the CPU check.
How to Bypass the CPU Restriction:

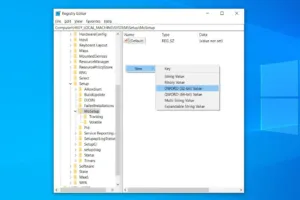
Credit: Techpolyp
- Press Win + R, type `regedit`, and hit Enter to open the Registry Editor.
- Navigate: Computer\HKEY_LOCAL_MACHINE\SYSTEM\Setup\MoSetup (You can either copy-paste this path into the address bar or manually click through the folders).
- In the right panel, right-click > New > DWORD (32-bit) Value.
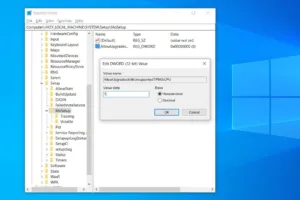
- Name it `AllowUpgradesWithUnsupportedTPMOrCPU.
- Double-click the new entry, set its Value data to `1`, then hit OK.
-

DWORD Enter Value1
Credit: Techpolyp
Close the Registry Editor. That’s all you have to do here.
Check Out Our Previous Posts:
Step 3: Install Directly from the ISO
This step is simple. You only have to activate the ISO and run setup like normal:
- Once the ISO finishes downloading, right-click it and select Open with > Windows Explorer (this mounts it as a virtual drive).
- Double-click `setup.exe` to start the installation.
- Follow the prompts carefully. Windows 11 should now install without complaining about your CPU.
That’s all in this tutorial. There are no complicated workarounds. It is a quick tweak that can be completed it minutes and you’re good to go.
Important Notes:
This isn’t a hack or a crack. It is a registry technique that Microsoft itself acknowledges. Also, you need to install Windows 10 first, then use the registry edit shown here to complete the task. Finally, Microsoft strongly discourages using this technique on unsupported hardware due to concerns about security, system stability, and long-term reliability.


